
How to Clean and Maintain a Manual Can Filling and Seaming Setup
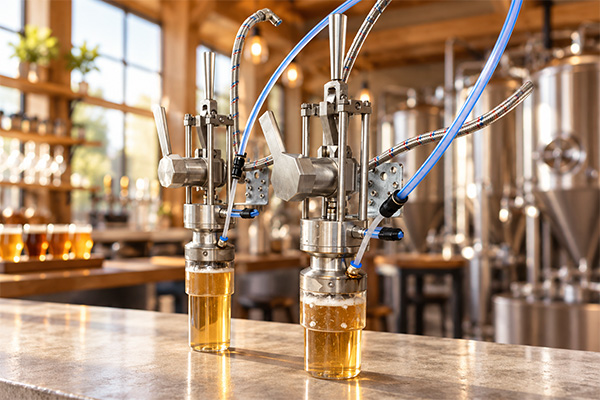
To clean and maintain a manual can filling and seaming setup, follow the equipment manufacturer’s approved procedures, clean and sanitize food-contact surfaces as required, inspect critical components before production, and document cleaning and maintenance activities. The correct method depends on the equipment design, beverage, cleaning products, and operating conditions. Do not apply a generic maintenance schedule to every machine: follow the manufacturer’s instructions for disassembly, cleaning, lubrication, adjustments, and servicing.
For small breweries, coffee roasters, beverage startups, and other small-scale producers, a consistent routine helps control contamination risks, spot wear before it disrupts production, and maintain reliable filling and seaming performance. Cleaning and maintenance are related, but they serve different purposes: cleaning addresses residue and soil, sanitizing reduces microorganisms on properly cleaned surfaces, and maintenance keeps equipment in suitable working condition.
This guide provides practical checklists for routine cleaning, pre-production inspections, preventive maintenance, and recordkeeping, with equipment-specific considerations for Eazy Canning’s FENIX filling head and iKAN can seamer.
What Is the Difference Between Cleaning, Sanitizing, Inspection, and Maintenance?
These activities should be treated as distinct parts of an equipment-care routine.
| Activity | Purpose | Example |
| Cleaning | Removes product residue, dirt, and other soil | Removing beverage residue from approved product-contact surfaces |
| Sanitizing | Reduces microorganisms on appropriately cleaned surfaces | Applying an approved food-contact sanitizer according to its label and the applicable procedure |
| Inspection | Identifies contamination, wear, damage, or other abnormalities | Checking accessible filler seals and seamer tooling for visible issues |
| Preventive maintenance | Keeps equipment in the operating condition specified by the manufacturer | Completing manufacturer-specified servicing or replacing an approved part when indicated |
| Verification and records | Confirms that required steps were completed and documents the outcome | Reviewing cleaning records, inspection results, and any corrective actions |
Cleaning generally needs to come before sanitizing because soil or organic residue can interfere with sanitizer performance. Use a sanitizer suitable for the intended food-contact application and follow its label, including any specified concentration, contact time, draining, drying, or rinsing instructions. Requirements vary by product and jurisdiction. The FDA Food Code provides model provisions for retail and food-service operations in the United States; the USDA FSIS guidance on sanitizers also explains why approved uses and label directions matter. Apply the regulations and food-safety requirements relevant to your own operation.
Maintenance is different. A machine can look clean but still have a worn seal, damaged tooling, a loose component, or an operating problem that needs attention.
What Should You Clean on a Manual Canning Setup?
A small-scale canning workflow may include a filling system, a seamer, packaging-handling surfaces, and equipment used to transfer the beverage. The cleaning method depends on the component’s design, its contact with the beverage or packaging, and the manufacturer’s instructions.
Filling equipment
A filler may include valves, seals, clamps, passages, and other parts that contact the beverage or control the filling process. Consult the manufacturer’s cleaning and inspection instructions to identify which parts are product-contact surfaces and which can be cleaned using a wet method.
Pay attention to areas where beverage residue can accumulate and to seals or connections where damage could affect performance. Do not disassemble valves, seals, or mechanical assemblies unless the manufacturer permits it and the operator has the correct procedure and training.
Seaming equipment
A seamer closes a can by forming a double seam between the can body and its end. The chuck, seaming rolls, and supporting components are important to the closing operation.
Remove accessible debris and residue using the approved method. Inspect accessible surfaces for contamination, damage, or abnormal wear. Do not assume internal mechanical components can be cleaned with water or that they should be lubricated after every run. The correct procedure depends on the machine’s construction and approved service instructions.
Other production surfaces
Include surrounding surfaces and tools in the cleaning procedure according to how they are used and their contamination risk. These may include:
- Work surfaces used for clean cans and lids.
- Trays and approved product-handling components.
- Areas where filled cans are transferred or temporarily held.
- Tools used for cleaning, inspection, or routine servicing.
Keep cleaned packaging and product-contact items protected from recontamination before use.
How Do You Clean a Manual Can Filling and Seaming Setup?
The following sequence is a planning framework, not a substitute for the official cleaning instructions for a particular machine. Use the equipment manufacturer’s procedure and your site’s written sanitation procedure whenever they specify a different method.
Step 1: Stop production and make the equipment safe
Stop the machine and follow its approved shutdown procedure. Isolate electrical power and release pressure where applicable before maintenance or before accessing parts that could move or release pressure. Allow the equipment to reach a safe condition before cleaning.
Follow the manufacturer’s instructions for components that must be removed or handled separately. Do not begin work if you are unsure how to isolate energy or pressure safely.
Step 2: Remove visible beverage residue
Remove accessible product residue with the approved method and suitable cleaning tools. Avoid methods that could push residue into inaccessible areas, damage seals, scratch food-contact surfaces, or introduce water into components that are not designed for wet cleaning.
Disassemble only the parts identified in the manufacturer’s procedure. If a component is not approved for removal by the operator, do not force or dismantle it.
Step 3: Clean with a compatible cleaning agent
Use a cleaning agent compatible with the machine materials and intended food-contact surfaces. Follow the product’s directions for dilution, application, temperature, contact time, and rinsing.
Do not assume that a cleaner suitable for a stainless-steel worktop is also suitable for every seal, valve, coating, or moving component in a filling machine. If you are unsure about compatibility, confirm it with the equipment manufacturer and chemical supplier before use.
Step 4: Rinse and sanitize where required
Rinse when the cleaning procedure or chemical label requires it. Where sanitizing is required, apply an appropriate food-contact sanitizer according to the approved procedure and label directions. Correct concentration and contact time matter; surfaces also need to be prepared as specified for the sanitizer to work effectively.
There is no single sanitizer concentration or contact time that should be assumed for every canning setup. Do not mix chemicals or use a product outside its approved application.
Step 5: Inspect the cleaned equipment
Check the accessible surfaces and components identified in the inspection procedure. Look for remaining residue, chemical deposits, damage, corrosion, leaks, or other abnormalities. If a procedure requires disassembly, inspect the specified components before reassembly.
Visual inspection is useful, but it does not by itself prove microbiological cleanliness or verify that all sanitation requirements have been met. Complete any additional verification required by your procedure.
Step 6: Reassemble and prepare for production
Reassemble equipment only according to the manufacturer’s instructions. Confirm that parts are installed correctly and that guards, clamps, and other safety features are in the required position.
Before processing beverages, complete the prescribed pre-operation checks. Do not start production if a food-contact surface remains contaminated or an equipment issue could compromise safe operation or package integrity.
How Should You Clean and Maintain the FENIX Filler?
The FENIX filling head is a manual counter-pressure filling system designed primarily for carbonated beverages. Eazy Canning describes FENIX as compatible with Clean-In-Place (CIP) systems and recommends regular cleaning and inspection of seals and moving parts. Follow the current procedure supplied for your particular configuration.
What is CIP?
Clean-In-Place, or CIP, is a method for cleaning suitable internal product-contact pathways without fully dismantling the equipment for manual cleaning. CIP compatibility does not guarantee that every cycle is effective: the procedure, cleaning agent, operating conditions, and any required verification must be appropriate for the equipment and residue.
For FENIX, use Eazy Canning’s approved CIP instructions. Do not choose an arbitrary temperature, chemical concentration, circulation time, or flow rate. If the procedure does not clearly state which components are included in the CIP cycle, ask Eazy Canning to clarify the limits of the process and any additional cleaning steps.
FENIX cleaning and inspection checklist
Before production
- Confirm the required cleaning cycle has been completed and recorded.
- Check accessible product-contact surfaces for visible residue.
- Inspect seals and gaskets for visible wear, damage, or deformation.
- Inspect the clamping system and accessible moving components for abnormalities.
- Confirm that the equipment is assembled and ready for operation according to its instructions.
- Complete any required pre-operation checks before introducing the beverage.
After production
- Follow the approved cleaning procedure for the filling head and applicable product-contact pathways.
- Complete the prescribed CIP cycle where applicable.
- Verify that the cycle has completed as specified and perform any required post-cleaning checks.
- Record leaks, unusual resistance, visible wear, or other issues observed during operation.
- Document cleaning completion and any corrective action required.
If a seal is damaged or a component appears abnormal, do not compensate by making unapproved pressure or mechanical adjustments. Follow the manufacturer’s troubleshooting and replacement instructions before returning the equipment to production.
How Should You Clean and Maintain the iKAN Can Seamer?
The iKAN can seamer closes cans using tooling selected for the applicable can and end combination. Eazy Canning describes iKAN as having a maintenance-free seaming head. That statement should not be interpreted as meaning that the entire machine never needs cleaning, inspection, or service; it means you should not assume that generic seamer maintenance tasks apply to its head.
Ask Eazy Canning for the current approved cleaning and maintenance instructions for your specific machine. Do not introduce lubrication, disassembly, adjustment, or tooling replacement unless the applicable instructions call for it.
iKAN cleaning and inspection checklist
Before production
- Inspect accessible surfaces for dust, beverage residue, or other contamination.
- Check the chuck, seaming rolls, and other accessible components for visible damage or abnormal wear.
- Confirm that the machine is stable and safety features are in place.
- Verify that the can format, can end, and tooling configuration are approved for the production run.
- Confirm the machine is ready for use according to its operating instructions.
After production
- Remove accessible residue using the approved cleaning method.
- Clean the drip tray and other removable parts according to the manufacturer’s instructions.
- Keep liquids and cleaning agents away from components that are not designed for wet cleaning.
- Inspect accessible tooling surfaces and record abnormal wear or damage.
- Complete the cleaning record and report any issue requiring service.
Do not lubricate the seaming head, adjust seaming rolls, or replace tooling just because a generic guide recommends it. If seam quality changes unexpectedly or the machine produces visibly defective seams, stop and investigate rather than continuing to package product with an unverified closure.
What Should You Check Before Each Production Run?
A short pre-operation inspection can identify obvious issues before they affect a batch. Adapt this checklist to the manufacturer’s instructions and your quality-control plan.
| Check | What to verify | Stop and investigate if… |
| Cleanliness | Required cleaning and sanitizing steps are complete | Visible residue remains or a required cleaning step is undocumented |
| Filling system | Accessible seals and components appear undamaged | There is leakage, seal damage, or abnormal operation |
| Seamer | Relevant accessible tooling appears clean and undamaged | There is visible damage, unusual movement, or recurring seam defects |
| Can format | Cans and ends match the approved setup | The packaging or tooling combination is unknown or unverified |
| Safety | Guards and controls are in their required condition | A guard is missing or a safety issue remains unresolved |
| Documentation | Required cleaning and inspection records are complete | A critical check is missing or a corrective action remains open |
Visual inspection alone does not prove that food-contact surfaces are microbiologically safe or that a can seam meets its dimensional requirements. Complete the required sanitation verification and seam-quality checks for your process.
How Often Should You Clean and Maintain the Equipment?
There is no single schedule that applies to every filler, seamer, beverage, or production environment. Frequency depends on the equipment instructions, product, operating conditions, residue buildup, contamination risk, and applicable food-safety requirements. Use the table below as a planning framework, then replace it with a written procedure based on the manufacturer’s directions and your operation’s requirements.
| Activity | Planning approach |
| Pre-operation inspection | Complete before each production run, or at the frequency specified in the operating procedure |
| Routine cleaning | Clean after use and whenever needed to prevent residue or contamination, following the approved procedure |
| Sanitizing | Perform according to the applicable sanitation procedure and before food contact when required |
| In-process checks | Complete at the points defined in the production and quality-control plan |
| Preventive maintenance | Follow the machine’s approved service instructions and act on indicated wear or faults |
| Detailed service or calibration | Schedule according to manufacturer guidance, operating history, and signs of deteriorating performance |
Do not treat this table as a substitute for cleaning or service intervals required by the manufacturer or local regulations. In particular, do not invent weekly or monthly lubrication, adjustment, or replacement intervals for a component when the machine’s instructions do not specify them.
How Should You Record Cleaning, Inspection, and Maintenance?
Written records make routine practices repeatable and help reveal trends that can otherwise go unnoticed. A small producer’s log can be simple, but it should document what was done, when it was done, who completed it, and what happened if a problem was found.
Recommended cleaning and maintenance log
| Field | What to record |
| Date and time | When the activity was completed |
| Equipment | FENIX filler, iKAN seamer, or another component |
| Activity | Post-run cleaning, inspection, or approved maintenance |
| Procedure reference | Relevant SOP or manufacturer’s instructions |
| Cleaning agent or sanitizer | Product used and any concentration details required by the procedure |
| Verification | Required checks and the results observed or measured |
| Condition observed | No issue identified, or a clear description of the abnormality |
| Corrective action | Service request, approved replacement, or other documented response |
| Completed by | Operator name or identifier |
| Release for production | Confirmation that required release checks were passed |
Adapt the fields to your process. For example, records of sanitizer concentration and contact time may be needed for a particular sanitation procedure. Do not enter a value unless it was measured or otherwise verified as required. Keep cleaning records distinct from product-quality and seam-inspection records when your process requires separate documentation.
Practical example: A small brewery’s end-of-run routine
Suppose a brewery finishes a batch using FENIX for filling and iKAN for seaming. The operator follows the approved FENIX cleaning procedure, cleans and inspects accessible iKAN components according to its instructions, and completes the sanitation checks required before the next run.
During inspection, the operator notices damage to an accessible seal on the filling system. Instead of simply recording that cleaning is complete, the operator documents the issue, follows the manufacturer’s instructions, and arranges the appropriate corrective action. The equipment is not returned to production until the required checks have been completed.
The record now traces the cleaning, inspection, problem, and resolution. Over time, similar records can help the team identify recurring issues and plan service based on actual equipment condition.
Common Cleaning and Maintenance Mistakes to Avoid
| Mistake | Why it matters | Better approach |
| Sanitizing without cleaning first | Residue can interfere with sanitizing effectiveness | Complete cleaning and any required rinsing before sanitizing |
| Using an unapproved chemical | It may damage materials or leave unwanted residues | Confirm compatibility and follow the product label and approved procedure |
| Spraying components indiscriminately | Water or chemicals may damage parts or create hazards | Use only the approved method for each component |
| Lubricating without instructions | The wrong lubricant or application can cause contamination or damage | Lubricate only where and as specified by the manufacturer |
| Disassembling tooling without authorization or training | Incorrect reassembly can affect operation or seam quality | Follow approved service instructions and obtain training when required |
| Relying only on visual inspection | Some contamination or seam defects cannot be confirmed visually | Complete required sanitation verification and seam-quality checks |
| Failing to document problems | Repeated issues may go unnoticed | Record abnormal findings and corrective actions |
| Continuing after a critical defect | Product quality or package integrity may be compromised | Stop, assess affected product, and follow the corrective-action procedure |
Good maintenance protects both the equipment and the product. It should not introduce new risks through unsuitable chemicals, incorrect lubrication, or unapproved adjustments.
Frequently Asked Questions
Should I clean my can filler and seamer after every production run?
Follow the approved cleaning procedure for each machine and the sanitation requirements for your beverage and process. Clean product-contact parts at the specified intervals and whenever necessary to prevent residue or contamination. The exact method and frequency should come from the equipment instructions and your written food-safety procedure.
Can I use the same cleaning products on FENIX and iKAN?
Not automatically. The machines have different functions, materials, and component designs. Confirm that each cleaner and sanitizer is suitable for the relevant surfaces and approved for the intended use before applying it.
Does CIP mean the filling equipment does not need inspection?
No. CIP is a cleaning method, not proof that every cycle was effective or that every component is included. Follow the approved procedure’s verification requirements, inspect the accessible parts identified by the manufacturer, and ask Eazy Canning to clarify any limits of the CIP process.
Should I lubricate the iKAN seaming head?
Do not assume that lubrication is required. Eazy Canning describes iKAN as having a maintenance-free seaming head. Follow the current service instructions for the specific machine and contact the manufacturer if a component’s requirements are unclear.
How do I know if my seaming tooling needs servicing?
Visible damage, abnormal operation, changes in seam appearance, or inspection results outside the applicable specifications may indicate a problem. Follow the can and end manufacturer’s inspection criteria and the seamer’s service instructions. Do not make unapproved adjustments to correct it.
What should I do if I find a damaged seal or defective seam?
Stop and follow your documented corrective-action procedure. Have the affected component assessed or replaced according to the manufacturer’s instructions, and evaluate any product that may have been affected. Resume production only after the required checks have been completed.
Is cleaning sufficient to make canned beverages safe for long-term storage?
No. Cleaning and sanitizing equipment are important parts of hygienic production, but they do not establish the safety or shelf stability of the packaged beverage. A product that requires a validated preservation process must meet the applicable requirements for its formulation, packaging, storage, and intended market.
Where can I find equipment-specific cleaning instructions?
Start with the instructions supplied with your machine and the current guidance from the manufacturer. See Eazy Canning’s FENIX filling head and iKAN can seamer product pages, and contact Eazy Canning to confirm any procedure that is not covered clearly in your documentation.
Concluding
A reliable manual canning operation depends on more than removing visible residue. Producers need a consistent cleaning procedure, appropriate sanitizing practices, equipment-specific inspections, and records that document the work completed.
For Eazy Canning users, FENIX is listed as compatible with CIP cleaning, while iKAN has its own seaming components and a maintenance-free seaming head. Follow the current manufacturer instructions for each machine rather than assuming procedures developed for other equipment apply to these models.
Build your routine around approved instructions, clearly assigned operator responsibilities, documented checks, and prompt action when problems arise. This supports hygienic production, reliable equipment operation, and a stronger foundation for quality control as production grows.
Need help choosing or configuring a small-scale canning setup? Explore Eazy Canning’s FENIX filling head and iKAN can seamer, or contact the team with your beverage type, can format, and workflow requirements.
